Over the past year one of the spaces that we have been majorly working on is our mudroom renovation. It’s actually the main entrance to our home. It was the most insane gross entry to a house ever!! I can’t even tell you, the ceiling was so low and it smelt so musty, and it was so tight…it was honestly the worst way to walk into a home ever…like the worst first impression a home could ever make. Fast forward to today, I feel like it’s now the most amazing light, bright, and spacious entry that I could have ever hoped for! I’m actually calling this space the #mudballroom because I put so many over the top details in it to make it feel elevated…like custom designed wallpaper, a herringbone marble floor, and even a chippendale inspired railing! I’m so excited to show you all the progress we’ve made in our mudroom renovation a.k.a. the #mudballroom!
I wanted to share some progress before a full reveal to share more of the process with you guys! Social quarantining is giving me the motivation to dig through my photos and get to typing! In the summer, I shared a shot of my husband’s brother working on the railing and a before shot of the space. Did you guys see this post? It’s one your favourites of all time!
Spoiler Alert
Make sure you read to the end of the post because I’m sharing some exciting news down there!
The Before (a.k.a. the Musty Old Claptrap…lol!)
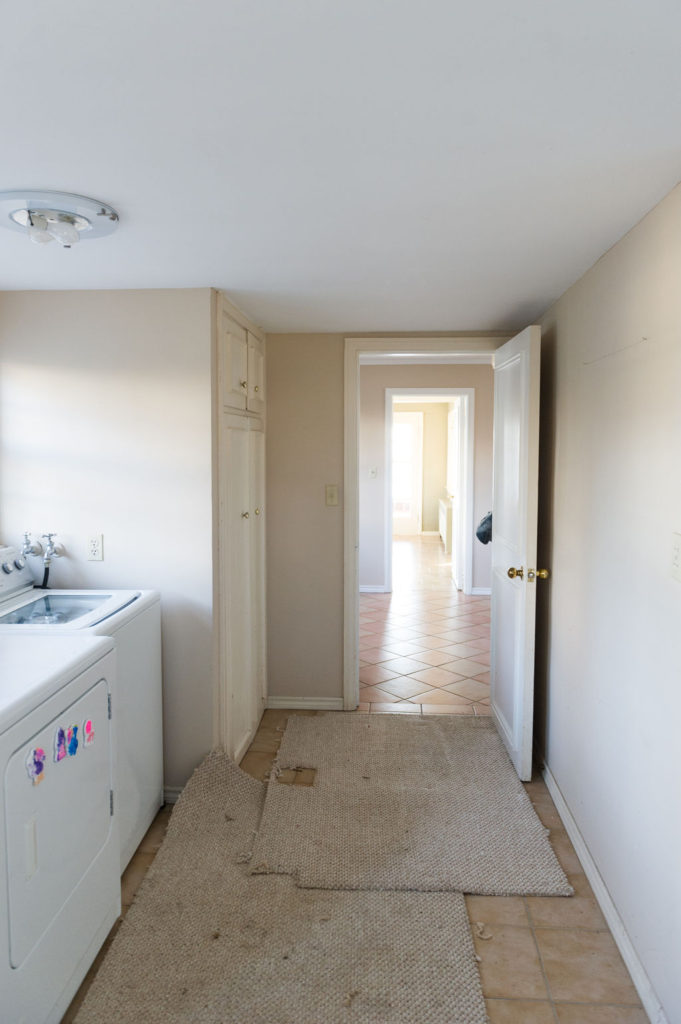
I’ve totally nicknamed the entire before of this house the Musty Old Claptrap from Arrested Development! Such a classic episode… had to include the clip for you guys!! But seriously imagine walking into this entry everyday…nope…must obliterate immediately! The funniest thing was it ended up being the last space to demo, so we did walk into it for so long and it scared the crap out of me, wondering if this house would ever be good enough in the end!
Mudroom Renovation Game Changers
- Opening up the Ceiling to hidden height
- Exposing the basement staircase and existing window
- Moving the Laundry to the second floor
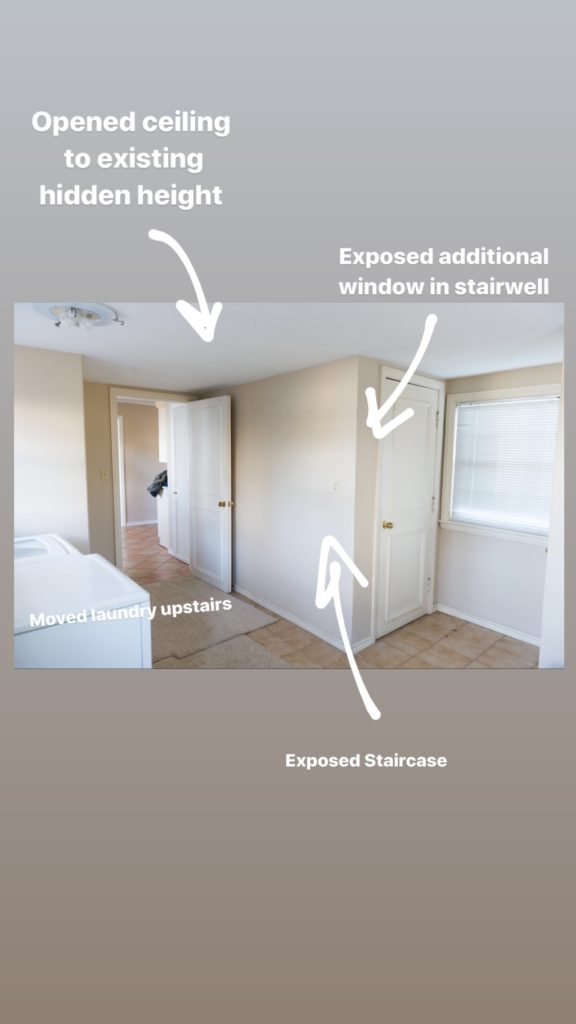
Progress shot tadaaaaaa!
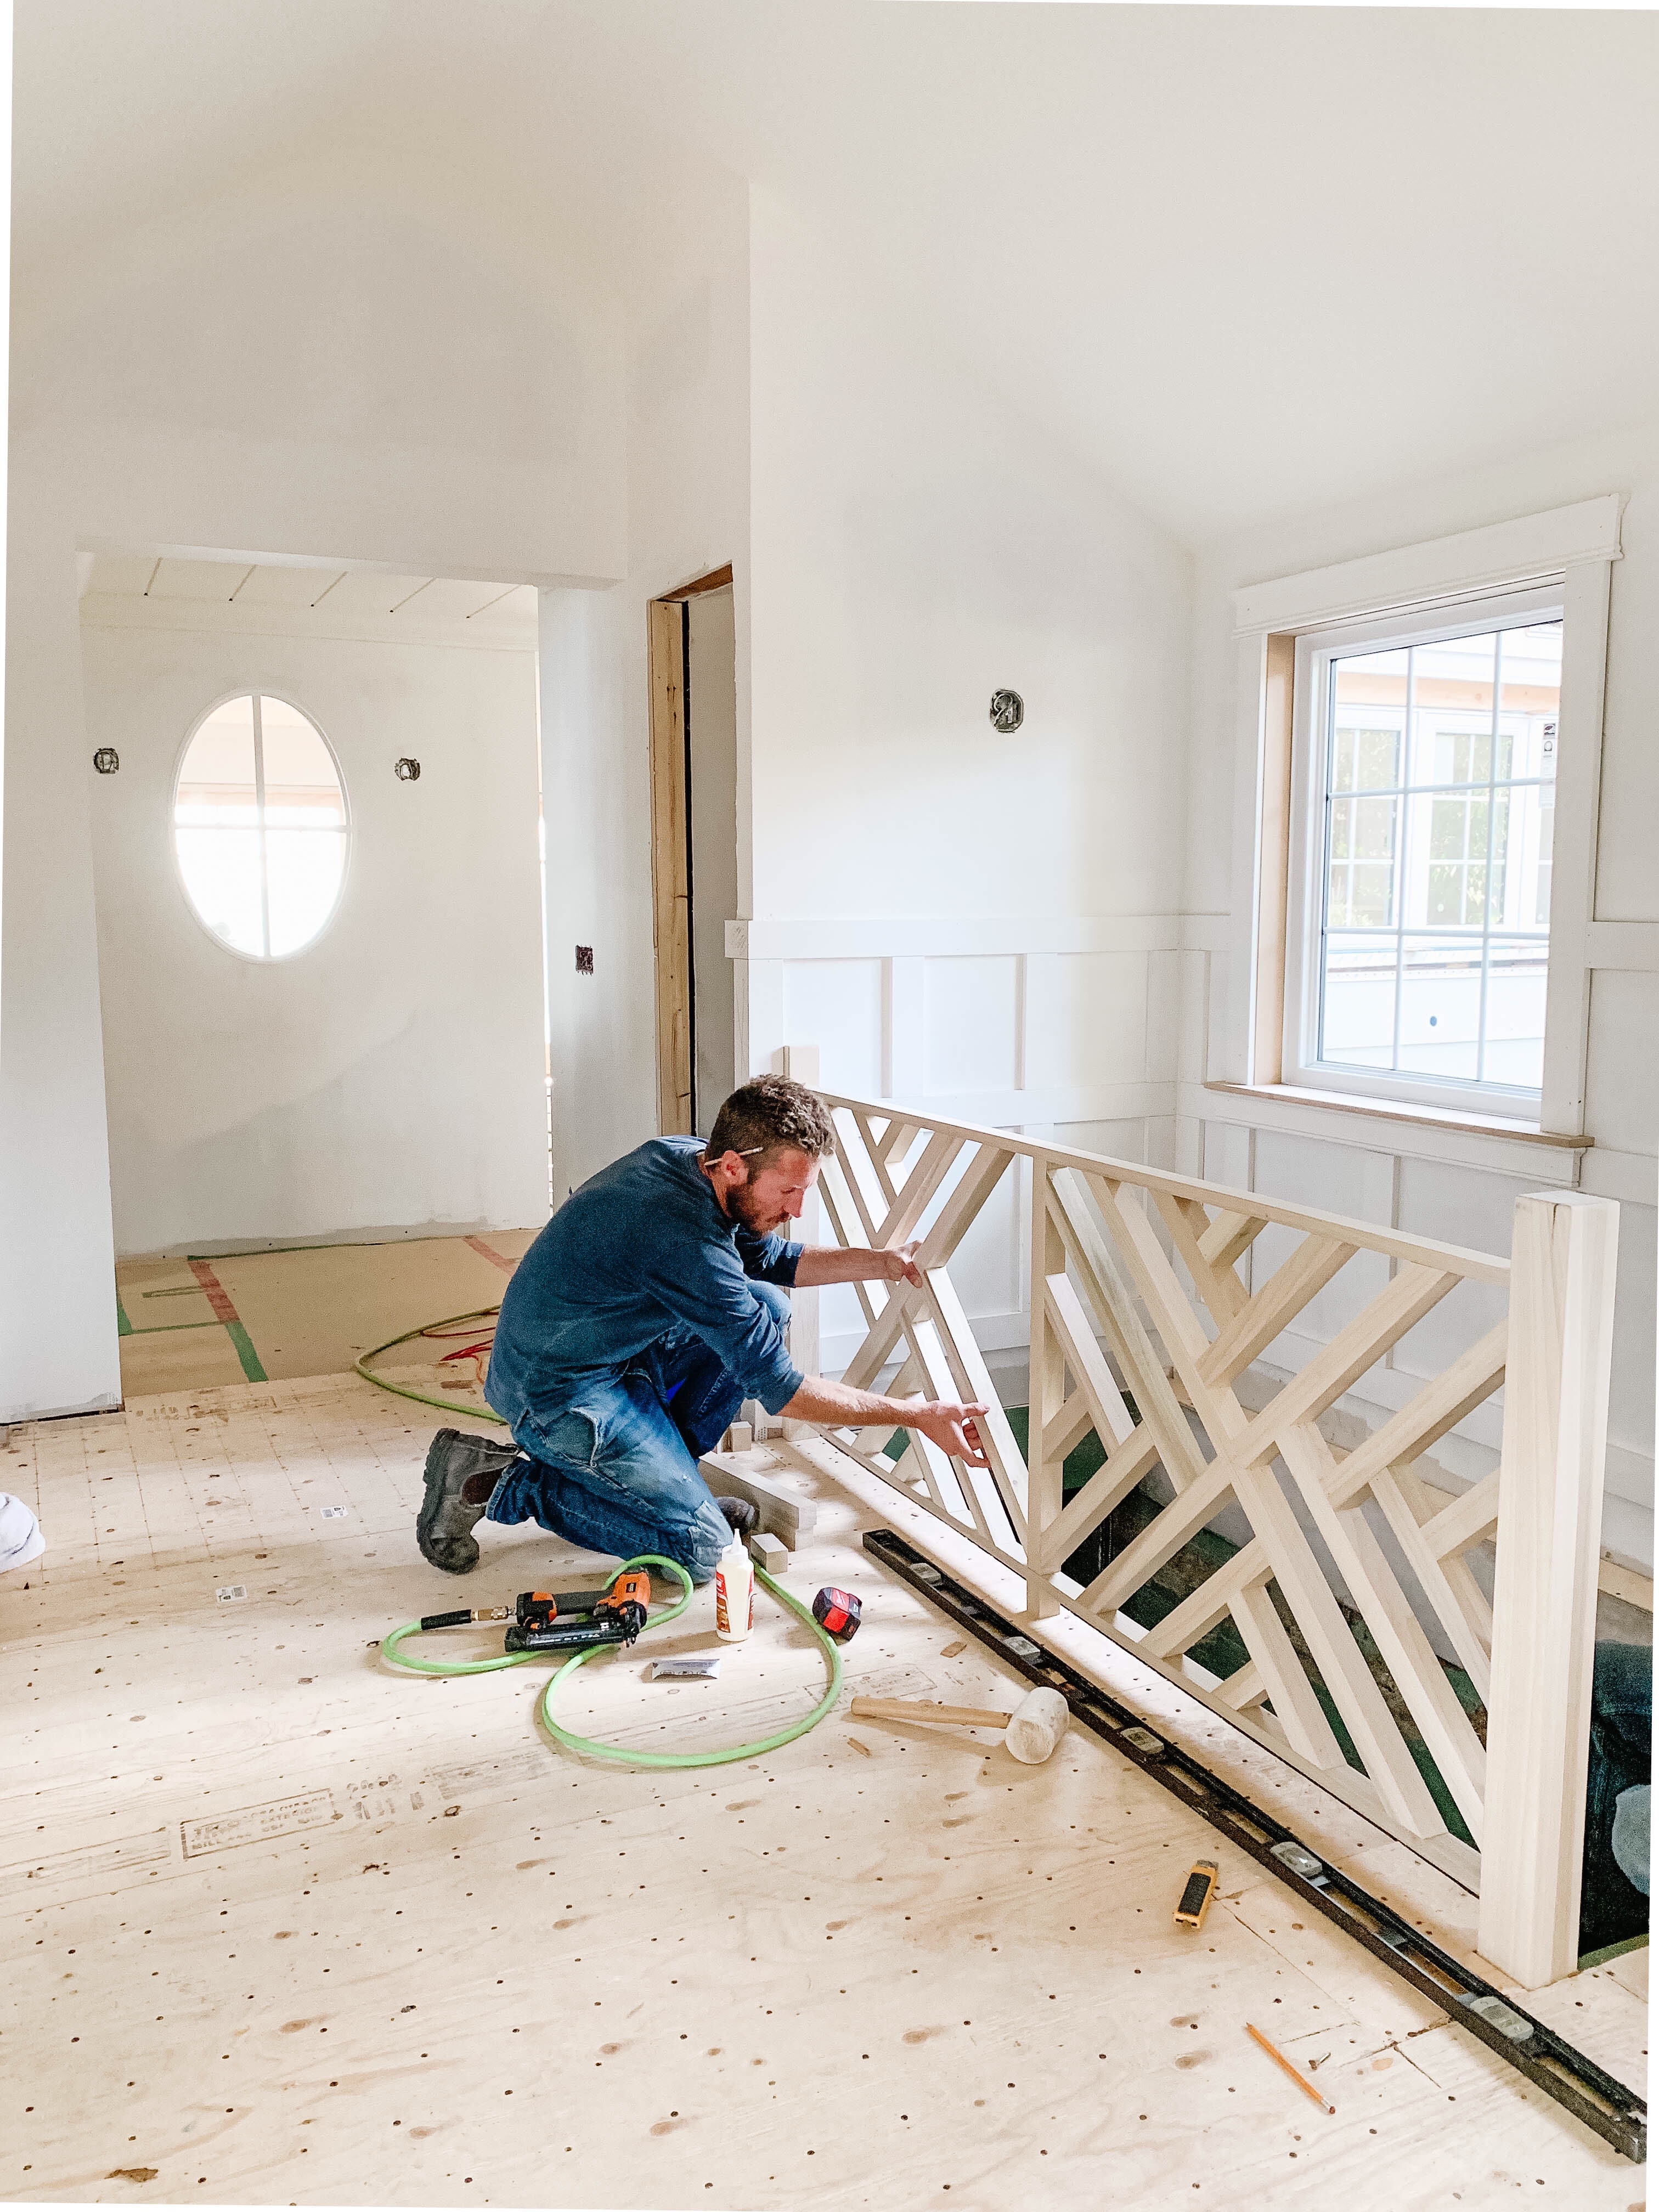
Taking down the wall that surrounded the basement staircase was something I really wanted to do to give the allusion of a much bigger room. We still have to replace that staircase going downstairs and add a door at the bottom. I had this vision of a chippendale railing for as long as I can remember so I’m so excited we found a spot for one. Matt’s brother, Ben Biggley, did an awesome job bringing my Pinterest pic to life! I really want to add this railing to the exterior of our home…and I did it in one other spot in our home too already….lots of tricks up my sleeve to show you!!
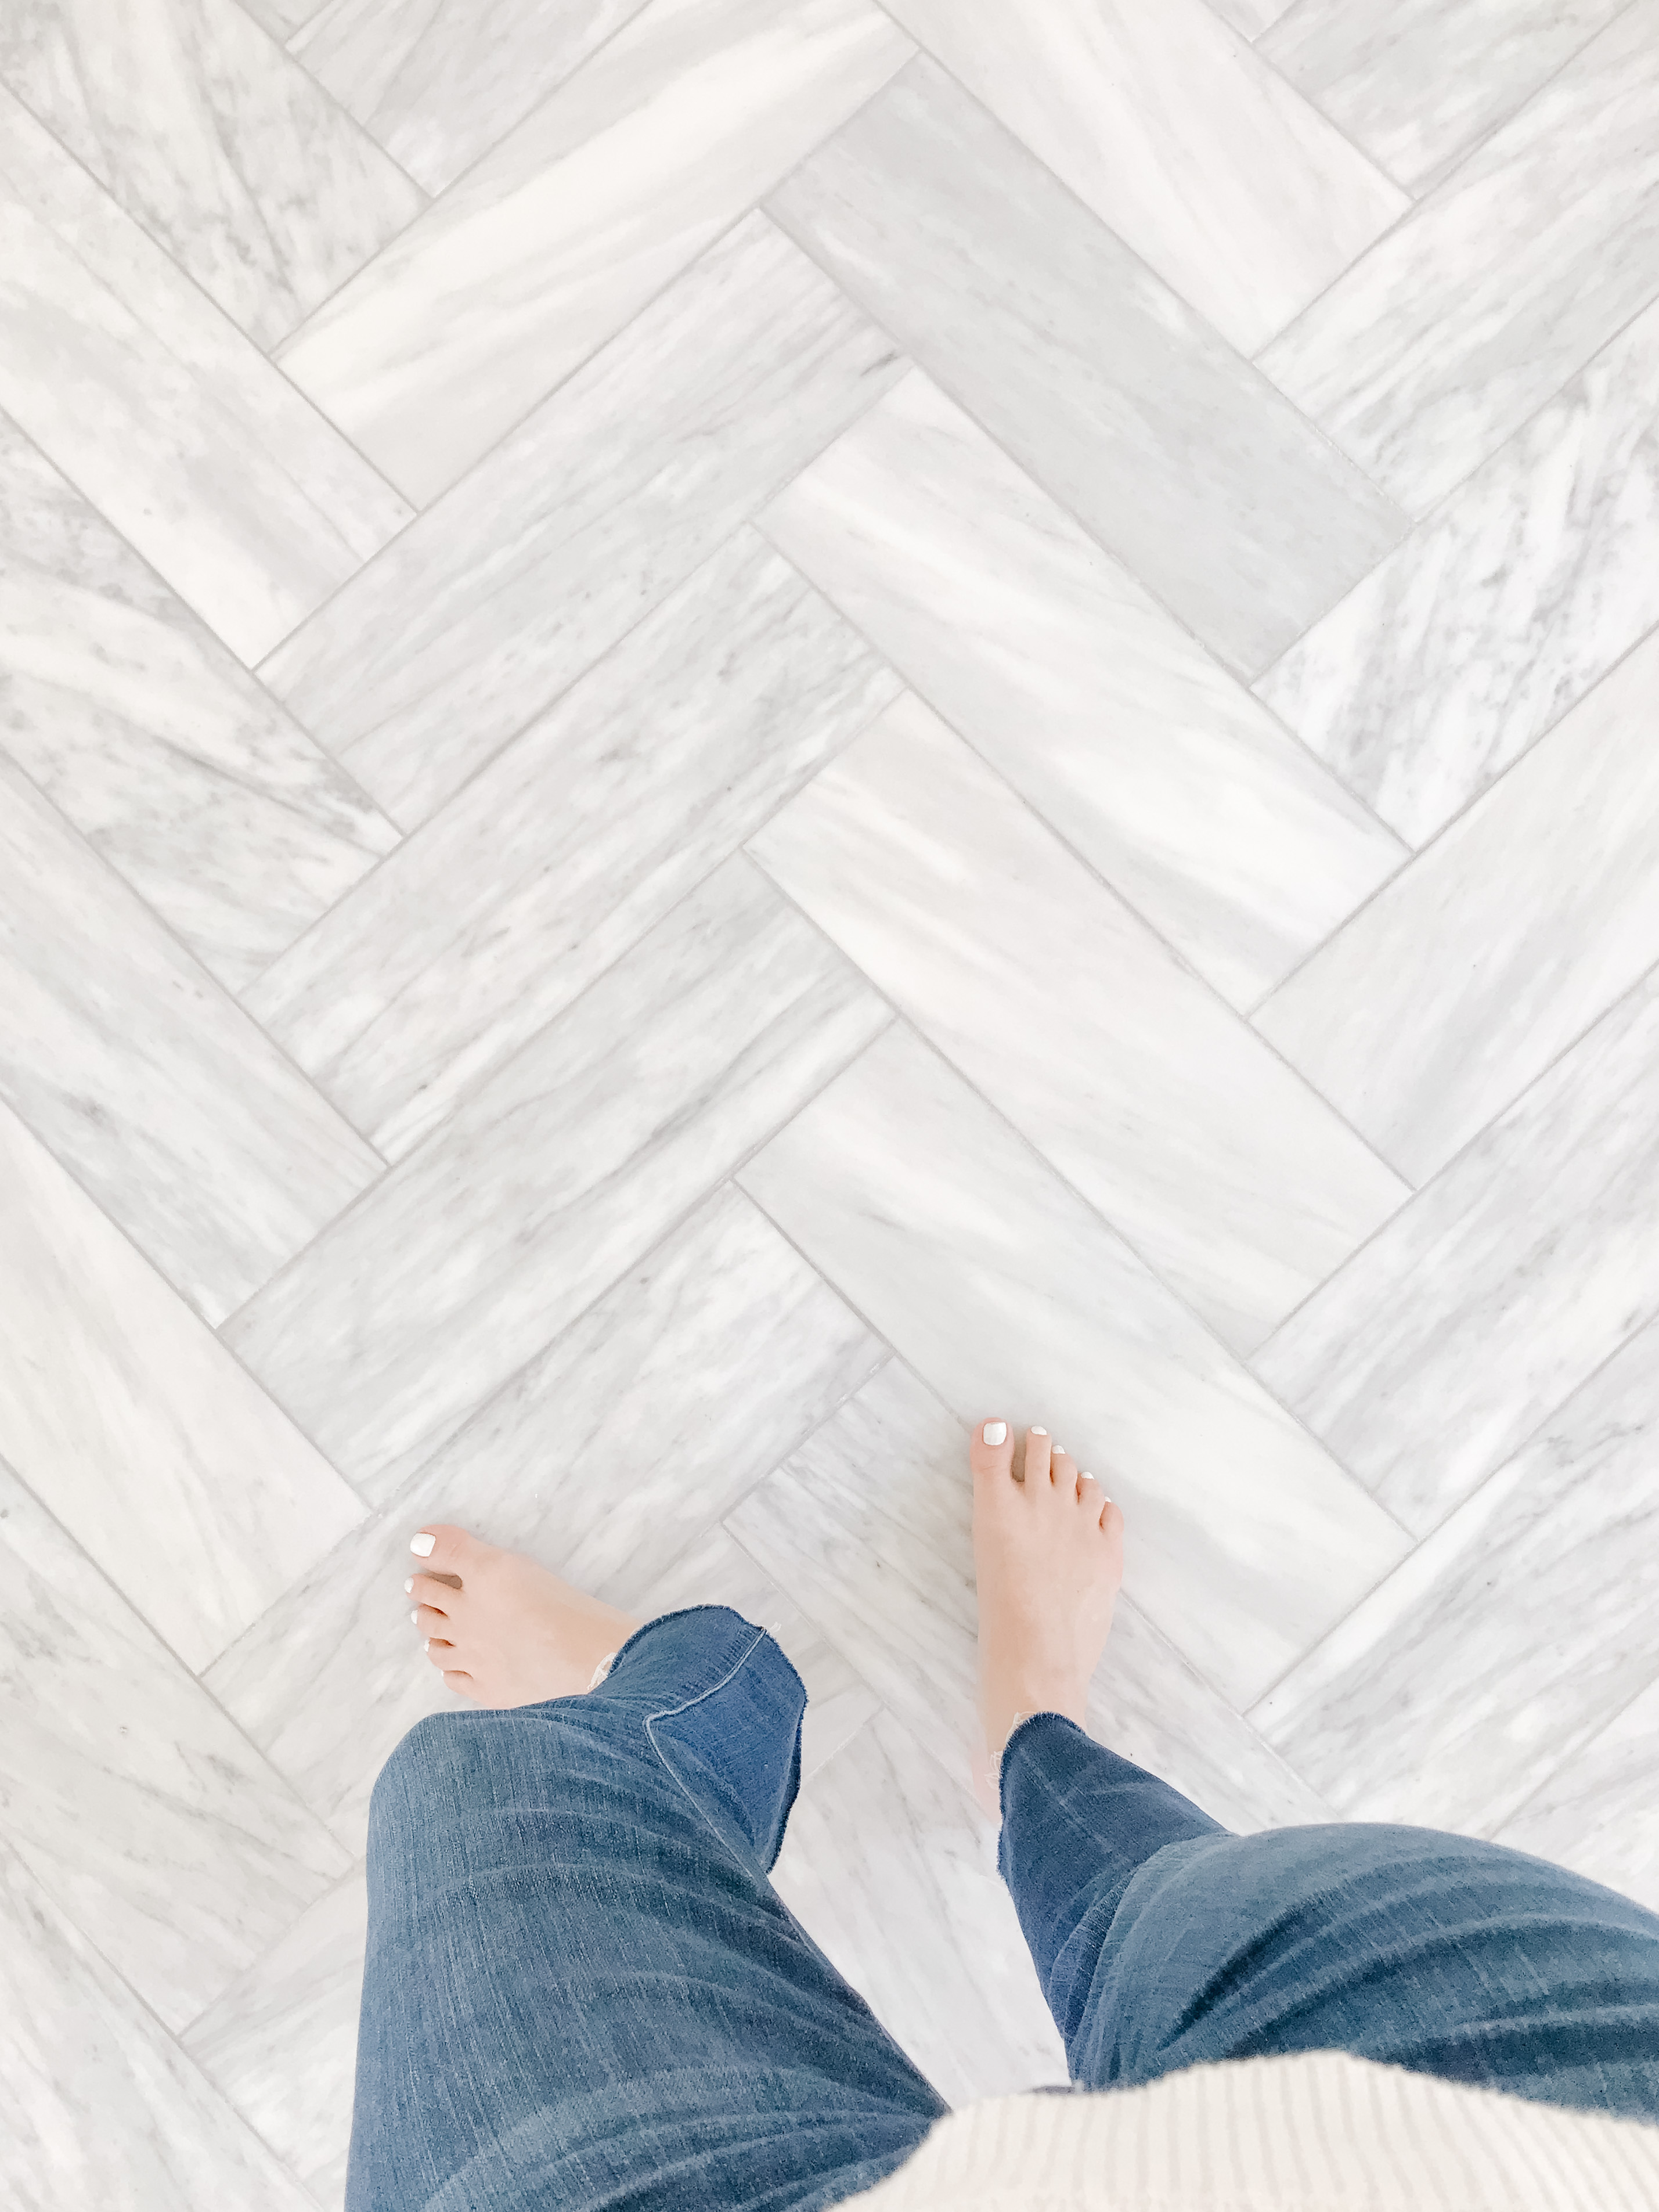
Marble Herringbone Floor
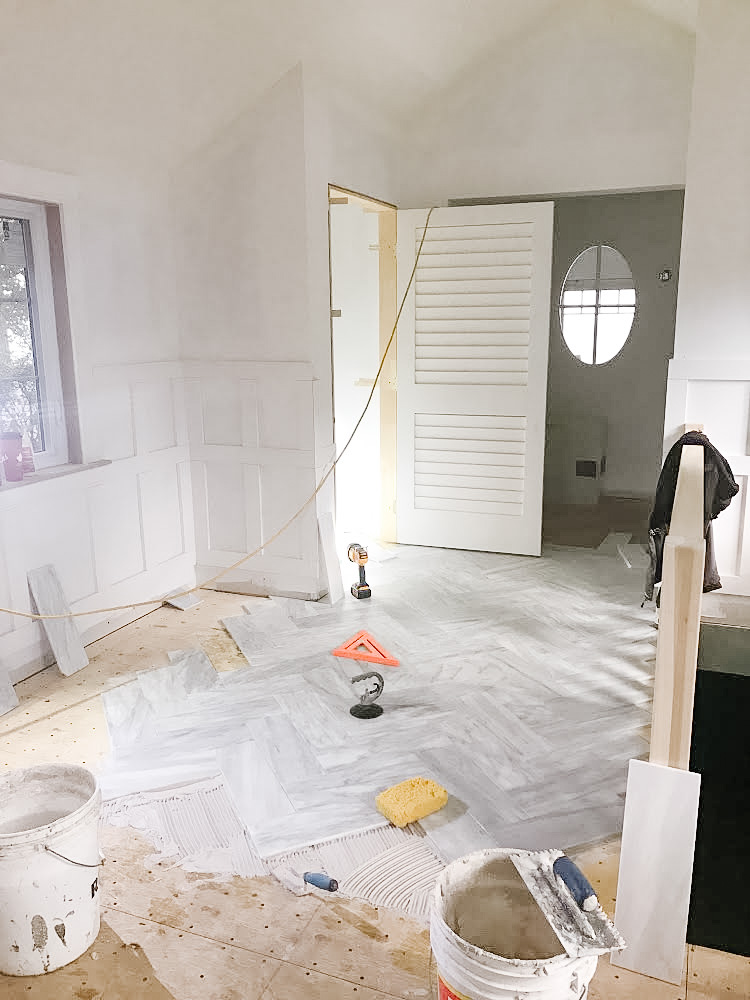
The story about the marble floor is that I wanted a herringbone pattern because I just love it! I feel like in an entry it’s a classic pattern that I’m always going to love. Plus it’s such a large floor space that the pattern really shows which is awesome!
Ok so back to the marble choice. In order to do a herringbone, in my opinion, you need a tile that is 3 x longer than the width, or it looks squat. So for example, if you use subway tile to do a herringbone backsplash the proportions are off 3×6 is only twice as long as it is wide. The right size for a backsplash is 2×6 or 3×9 ….make sense? 😉 So when I started to look for tiles any that were 6×18 were crazy prices in ceramic.
I feel like ceramic tile pricing on the whole has gone absolutely mental. It’s more money to get a faux hexagon mesh tile than a marble one? ummmm….reminds me of mdf cabinets vs real wood…don’t even get me started! So when I found my dream marble 6 x 18 and it was a great price, I had to go with it! Yup it’s gonna scratch and patina but I’m ok with it. The honed marble is beautiful. I feel like marble has such an amazing aura about it. I went with all marble floors in this home- the other two floors are in the two upstairs bath renos…which I’ll be sharing their progress story asaparino!
The marble tile that I found in 6 x 18 is linked, here. I went with the honed.
What’s the downside to marble? The cost is not in the tile, it’s in the install…you install marble tile with a wet saw which takes a lot longer to cut and the tiles are not uniform (colour/veining) so you have to really lay them out. Oh my gosh my installer Sergio (who I love) would tell you this floor was labor intensive to get it all feeling 100% cohesive…but he did it and I’m so in love with it in the end! Can’t wait to show it to you in the reveal!
Major Big Exciting News!
In my next mudroom renovation update (next week i’m hoping) I’m going to share a collaboration with you that is 5 months in the making! You guys this is crazy, but I collaborated on a custom designed wallpaper that you’ll be able to purchase right now for yourselves…it’s not just any wallpaper. It’s like the best wallpaper ever of all time…not even exaggerating! I want to put it EVERYWHERE…in fact I keep asking my husband, would it be weird if I put it in our family room, and our hallway, and our bathroom…and he’s like ya a little weird….then I’m all pouty lol! I know you’re going to love it and I can’t wait to show you it!
So next update, I’ll be spilling the tea on my wallpaper collab of dreams and all of the furniture and lighting choices!
Let me know if you have any questions and I’d love to know what you think of the changes so far in the comments!

Wow, the changes are totally amazing. I love that railing and the floors. This looks so much better and so impressive.
Thank you so much Marty, I’m so happy you’re liking how it’s turning out! Can’t wait to show you the finished space!!
Wow, Leslie your home is absolutely beautiful . Looking forward to more room reveals. 😊
Thank you so much Jenny! I can’t wait to show you more reveals, thanks so much for being here! I’m super excited about this one…I can’t wait to show you the mudroom when it’s done…thank you so much for the message!
I cannot WAIT, to see this final reveal!! I love the Chippendale railing. what a difference opening up that stairwell makes. it looks like a different home!
Thank you so much for the comment!…I was definitely going for different home- so that’s awesome!!
I absolutely LOVE the marble floor, and the herringbone pattern.
But do you not have to lay the marble over a cement board to prevent future cracking with movement?
Can you safely just lay it over a plywood base?
Thank you so much! There were two layers of plywood and it was screwed down about every four or 6 inches I believe…From what I remember, there was a pencil grid that looked like graph paper drawn on the plywood and every intersecting line had a screw put into.Hope that helps!
I am totally in love with your flooring! It looks amazing. Can’t wait to see the reveal!
thank you so much! It’s up now, I hope you like it!